Shoot to the Max
You know that the magic hours around dusk and dawn are the best times for making dramatic and evokative images. But what do you do if you are only at a location for a couple of days? How can you maximize your shooting time to take advantage of the few hours you have, becasue we know the more images you take the more great shots you are likely to make?
Here's my madness:
1) Up on location before sunrise to shoot the obvious ![]()
2) After the Sweet Light has gone, switch to long exposures with a neutral density filter such as the B+W 110 or SinghRay Vari-ND. The light will still be feeble enough that you can get some terrific effects if you're at the beach or shore, or if there's a breeze and the clouds are moving fast.
3) Getting close to midday - time for Infrared mode and shoot IR for a couple of hours whilte the sun is at its peak. Look for graveyards, big rocks in the forest, you want lots of foliage for intriguing IR subjects.
4) Lunch! Perhaps some food shots with your 50mm 1.2 or (more likely) 1.8. Nice artistic views with minimal depth of field, shooting wide open. If you have a Nikon D700 you're laughing - because of its larger sensor it's brilliant for artistic "product shots." Ask for a table near the window so you can take advantage of the natural light, hopefully it's a northern exposure and a white linen table cloth! Order one of those fancy deserts with the carmelized sugar lattices jammed on top - they make super food photos!!!! Plus, it's a nice reward for all your work so far (wink).
5) Next up: Pack your tripod and scout the back roads for old barns and abandoned buildings. Have your safety boots on hand, or should that be "on foot" (?!) and tread lightly if you find a place to explore the insides of. If the roof is crumbling, observe where the sun is overhead and try to take advantage of any light coming through. Set up for some HDR (high dynamic range) shots. My best results come with a bracketed series of 5 - 2 below, 0 and 2 above, in 1 EV increments. Stick around for at least a hour getting down, or up and exploring all the angles. Go with a buddy to be safe and remember I'm not advocating tresspassing ![]()
6) By now it's getting later in the day and if you need a nap, now would be the time. However, better to do some more scouting for where you will do your sunsets. Beach? Piers? Rocky Mountain tops glowing orange? Sillhouettes of sail boats, kiteboarders, fences, catherdrals, treetops? Plan your time well and get it all figured out. Need to recharge your batteries? Need more cards? What lens will you use? What ISO, - what White Balance setting? You know that when the light starts changing you won't have a lot of time. Be ready for it. And don't forget to turn around to see the view BEHIND you - opposite the sun. Stick around for at least 30 minutes adter the sun has set. Some of the most remarkable scenes happen when you least expect it, like when you think the day is over!
7) And it's not over yet...grab your tripd and your widest wide angle and head out after dark to shoot the stars! High ISOs are needed, and I find that on a moonless night about 30 - 45 seconds will caputre the Milky Way. You could spend another 3 hours with the star trails, constellations and meteors.
I'm pooped already! Just thinking about how many images I could (and do) take following this schedule. But it is doable and when I'm away some place I give myself at least on full day like this just me and my gear. But by using a variety of techniques you can really maximize your time and capture the place in many unque views and times, each a snippet of the essence of that microdot in time. And now, it's all yours.
OK, you can fluff up that pillow and kick back.
ZZZZZzzzzzzzzzzzzzzz
Time for the ziplocks
I spent a lunch hour at Mountain Equipement Coop, getting some supplies for my upcoming trip. First on the list was a set of waterproof double heavy duty special ziplock bags made just for electronics (cell phones, BBs, cameras!)
There's a super jumbo size that will fit nicely over a DSLR , but you'll have to keep the lens pointing out of the partially sealed ziplock so you can get a clear shot. but in my hour or so of testing it kept the camera and lens dry and prevented drops from splashing on the lens glass.
The kit is about $30, and has an assortment of sizes. You can also get other size by special order. The assortment pack is good for me and I have a ton of gizmos! My iPhone and my GPS go with me everywhere too and these pouches are perfect for them!
If you're desined to be out doors in soggy wet dismal weather (best photos happen with weather!!!) these waterproof baggies will make sure that you're not stressing about killing all your gizmos AND will allow you to shoot in a downpour, for some artisitc and hopefully dramatic shots.
I have a few more inclement weather tips coming up - I've had plenty of time to practice and perfect them this year!
ttfn,
![]()
40 days and 40 nights....
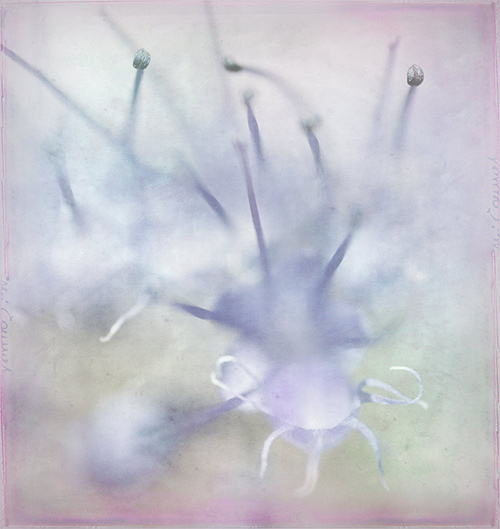
And I'm not talking plain old rain showers. Oh, no! - I mean 40 days of continuous downpour and all weekend long too. Even for diehard nature freaks like me, this was a weekend to stay indoors and work on images. I set up a tabletop "studio" on my porch where the light is soft and subdued (really didn't need this as the cloud did it all for me!!), opened the windows and listened to the torrents come down, and got inspired to shoot some still lifes - you know vases, flowers, fruit etc.
Then I got distracted with some more of this year's BC shots. And here's the result of that:

If it rains anymore my upcoming vacation/infrared shoot will be a washout!!!!
Oh well, gotta go with the flow, it's a white water trip by now!!!
Infrared Post-processing Tutorials and Infrared Photoshop Program
If you're a subscriber to my newsletter or have bought stuff from me before, you already know about my NEW Infrared Photpshop Post-processing Program. It's the most complete set of digital infrared post processing tutorials for Photoshop ever!

Today, it's available for everyone. If you haven't got your hands on it yet be sure to see how much you get. You can get the instant download, or order the CD. Over 100 photographers have already signed up, so if you want to stay on the leading edge of digital infrared Photoshop techniques and postprocessing tricks, order your infrared tutorial program program today.
I personally guarantee you will love it!
Keywords: infrared_postprocessing,photoshop_tutorials_for_infrared,tutorials
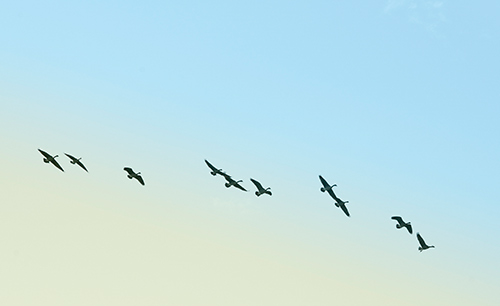
They're on the move already

Rain, cool, wet...If I had wings I try it somewhere else too! But these geese are smart and leaving early this year. I watched for a half hour as they gathered forces and eventually fled. Boy, it seems like I just saw my first one of the year a few days ago...
Time, like the birds, does indeed fly.
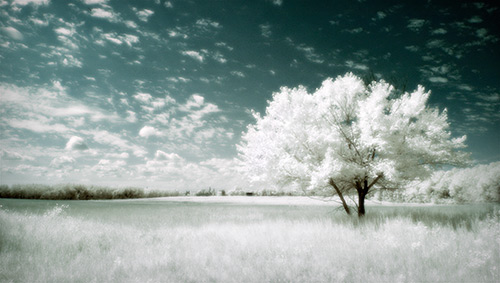
"reaching out to find..."

This is where the dragonflies play. Where the stars fall to rest.
This is where the forest and the field part ways. But where their paths merge the best.
It's a bit of a magical meadow, motionless in the moonlight.
It's an almost perfect place...
Keywords: infrared
Get More Creative!
My newest "how to" book can help you sort through the technical fog, to help you create professional-looking digital photos. Instant download! Be taking better photos by suppertime! 
Breaking news:
Search!
Share this Blog!
Share This Site!
Just one click will add us to your favorite bookmarking service.
Archives
Aug 2010
Jul 2010
Jun 2010
May 2010
Apr 2010
Mar 2010
Feb 2010
Jan 2010
Dec 2009
Nov 2009
Oct 2009
Sep 2009
Aug 2009
Jul 2009
Jun 2009
May 2009
Apr 2009
Mar 2009
Feb 2009
Jan 2009
Dec 2008
Nov 2008
Oct 2008
