Set a Trap...What a Catch!
It is practically February, and in February a girls heart turns to...macro photography. Yes, spring is not far off and that means delightful opportunities to shoot budding flowers, awakeing bugs, and all sorts of micro-aliens lurking in the emerging vegetation.
Here's a very cool way to make your camera into a MACRO BUG TRAP for crisp tack sharp macro images everytime (almost!)
You can get the Nikon D300 (and D70, as well as most of the other Nikon models too, I'm told, although I haven't tested them personally) to wait and release the shutter only when an object has moved into a preset focus zone if you set the AE-L/AF-L button to AF ON (set in custom function a10).
STEPS TO TRAP YOUR FOCUS:
Set your camera to AF-ON (D300: Custom Function - pencil menu - 10).
Move in to where you want your subject to be captured/trapped, and use the AF-ON button to focus. Release the AF-ON button.
Back away or re-compose. Now, keep the shutter pressed all the way down while NOT pressing the AE-L/AF-L button, and move closer to your subject or trap zone keeping the shutter down all the way. If you are shooting s stationary subject, the shutter will release when that subject isinside your focus trap. If you are waitng for something to move into your trap, the shutter will release automaticaly when your subject crawls or slithers into the focus trap zone that you set in step 2.
Now aren't you looking forward to macro magic too? Have a good weekend, make sure to remember you ABCs (Always Bring Camera)
Sparkle & Shine
Candles. Us girls love them!
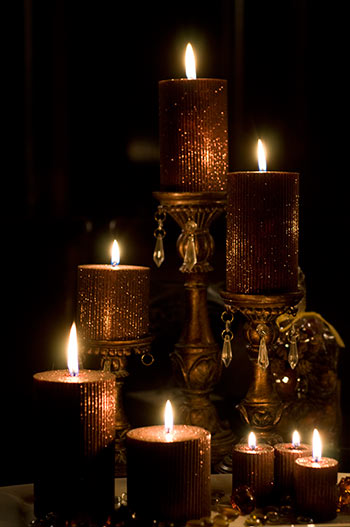
I had a great assignment this week, photographing a wonderful assortment of gorgeous all natural beeswax candles. I was working with my set stylist who has absolutely every conceivable ornament and table decoration. We designed the most beautiful and romantic settings for these candles! However looking at the shots back on the computer, despite all our fabulous table fashions, they were missing something. Can you guess?
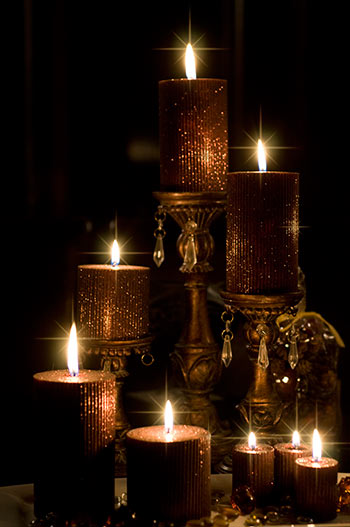
Yep, while the candles and their display looked pretty awesome (if I do say so myself), those little sparkly stars were missing. You know, those spiky points of light that make a candle lit scene intensely appealing…
Now in the old days, I’d have shot the entire shoot (!) with a crosshatch filter, which diffracts the light and makes those pretty stars. But the extra glass of the filter on the digital lens I was using created ugly hotspots and flare like blotches on the images. A problem quite often with digital lenses and old-school filters. All was not lost though. Brushes to the rescue!
A few creative clicks took care of everything. See for yourself.


My method for using these brushes is to create a new layer, using the eye dropper too, I select the colour of the glow around the candle to make this the brush colour. then I brush on the new layer, and set its blending mode to screen. Viola!
You can get star effect brushes here or just Google star brushes for Photoshop.
You can get the sparkly candles here!
Adding a New Layer to your Photography
For most of us, a day of shooting will yield 3, maybe 4, stellar images. (And this may be high!). Despite our best efforts, 90% of the the light will not be quite right and so we're left with a photo with a good subject, good composition, a good story, but little drama or wow factor.
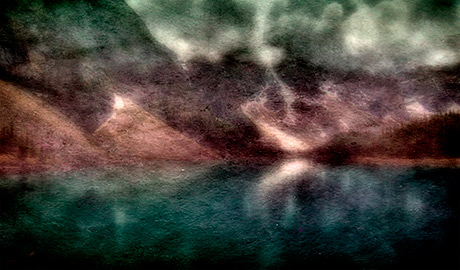
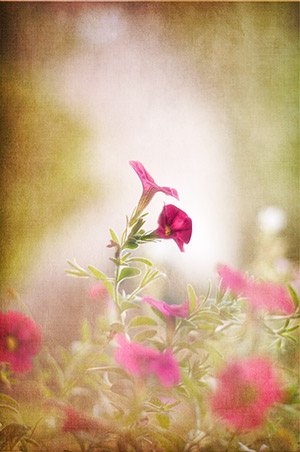
These images though can be saved using overlay layers and textures. Textures have been around for a long time, even back in the darkroom days, we used texture negs and "dupes" to achieve new and novel ways to finish our photographs. Now with digital photos and image editing software like Photoshop, we can salvage many images that normally would be deleted. Overlays and fine art textures, combined with a few other techniques can transform a plain image into a painterly fine art photograph. Once you get to know what types of textures work well, and which colour tones enhance nature images, you can become very adept at creating artistic photos.
Keep in mind though that the type of textures I'm referring to are not simply photos of brick walls, rusty dumpsters, or the types of textures you can downlolad for free on so many websites these days. These are special textures (some specifically created for nature and landscape photographers) that take the rule of thirds into account, as well as the range of shades and tones common in nature photography.
Watch for Part 2 of Overlays and Textures along with some free samples for you to use on your own images.
Check out the before and after here.
Here are a few of my recent examples (after).


Happy New Year
Goals? Plans? The gift of starting anew? Isn't it a remarkable thing that we give ourselves when we embark on a new year? The old is officially in the past, and we give ourselves permission to move forward with a clean slate. Love it!
My goal this year is to make it a great year for everyone I know. Lofty - perhaps. But if you don't aim high you'll always fall short. I read in some customer service book that our goals as business people is that everyday we should make someone's day. If a customer (or a friend) says, "Wow you just made my day!" - you have served your purpose. I'm pretty sure Clint Eastwood would agree!
And yes despite the recent speed bumps in the family side of things, this Christmas was amazing! And with the full moon illuminating the brand new sky of 2010, you know the next 365 days will be supercharged as well. Be sure to check out my favorite holiday pics...
READ MORE...Get More Creative!
My newest "how to" book can help you sort through the technical fog, to help you create professional-looking digital photos. Instant download! Be taking better photos by suppertime! 
Breaking news:
Search!
Share this Blog!
Share This Site!
Just one click will add us to your favorite bookmarking service.
